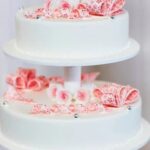
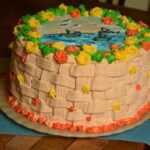
Cake decorations play a crucial role in transforming simple baked goods into eye-catching and delectable works of art. Whether it’s a birthday cake or a wedding masterpiece, beautifully decorated cakes not only please the eyes but also enhance the overall experience of indulging in these sweet treats. In this article, we’ll explore the world of cake decorations and provide you with step-by-step instructions on how to make your own stunning creations.
Creating visually appealing cake decorations is an essential skill for any aspiring baker or cake enthusiast. A well-decorated cake can serve as the centerpiece of any celebration, leaving a lasting impression on guests. From elegant fondant sculptures to intricate piping designs, there are countless techniques and tools that can be employed to elevate your cakes to new heights of artistic excellence.
To get started with making your own cake decorations, it is important to gather the necessary tools and materials. Piping bags, nozzles, fondant, food coloring, and various other supplies will be needed depending on the type of decoration you wish to create. These tools are essential for achieving professional-looking results and unlocking endless possibilities for your creative endeavors.
So let us delve into the world of cake decorations together, exploring different techniques and methods that will enable you to transform plain cakes into edible masterpieces. From buttercream piping to working with fondant, we will guide you through each step of the process, providing helpful tips along the way. Get ready to unleash your creativity and turn ordinary cakes into extraordinary works of art.
Necessary Tools and Materials
When it comes to making cake decorations, having the right tools and materials is essential. Without the proper equipment, achieving professional-looking results may be challenging. In this section, we will discuss the necessary tools and materials needed for cake decorating.
One of the most important items for cake decoration is a piping bag. Piping bags come in different sizes and can be reusable or disposable. They allow you to pipe buttercream or other frosting onto the cake in various designs and patterns. Along with piping bags, a set of nozzles is also necessary. Nozzles come in different shapes and sizes, each creating a unique design when used with a piping bag.
Another essential material for cake decoration is fondant. Fondant is a smooth icing that is used to cover cakes for a sleek finish. It can also be shaped into various decorations such as flowers or figurines. Food coloring is crucial for adding color to both frostings and fondant. Gel-based colors are preferred as they don’t affect the consistency of the icing or fondant.
In addition to these basic tools and materials, there are other optional items that can enhance your cake decoration experience. These include an offset spatula for smoothing frosting, edible glitter or luster dust for adding sparkle, silicone molds for creating intricate designs, and an airbrush kit for more advanced techniques.
By having all the necessary tools and materials on hand, you’ll be well-equipped to create beautifully decorated cakes that will impress your guests.
Preparing the Base Cake
Baking and preparing the base cake is an essential step in creating beautifully decorated cakes. The right cake flavor and texture can enhance the overall appearance and taste of the final product. Here are some step-by-step instructions to guide you through the process:
- Choose the Right Cake Flavor: Consider the occasion and personal preferences when selecting a cake flavor. Popular options include vanilla, chocolate, red velvet, and lemon. It’s important to choose a flavor that complements your chosen decorations.
- Gather Ingredients: Preheat your oven according to the recipe instructions. Assemble all the necessary ingredients, such as flour, sugar, eggs, butter, baking powder or soda, and any additional flavors or mix-ins.
- Mix Dry Ingredients: In a large mixing bowl, whisk together the flour, sugar, baking powder or soda, and any other dry ingredients specified in your recipe.
- Cream Butter and Sugar: In a separate bowl or using a stand mixer with a paddle attachment, cream together softened butter and sugar until light and fluffy. This will create a good base for your cake.
- Add Wet Ingredients: Gradually add eggs one at a time into the creamed mixture until well incorporated. Be sure not to overbeat.
- Alternate Flour Mixture and Liquid: Slowly add the dry ingredients to the wet mixture in batches while alternating with liquid (such as milk or buttermilk), beginning and ending with dry ingredients.
- Mix Until Just Combined: Be careful not to overmix; just stir until all ingredients are combined evenly.
- Prepare Baking Pans: Grease your desired baking pans with butter or cooking spray to prevent sticking when removing baked cakes later on.
- Bake According to Instructions: Pour the batter into the prepared pans and bake at the recommended temperature stated in your recipe’s instructions until a toothpick inserted into the center comes out clean.
- Cool and Remove from Pans: Allow the cakes to cool in the pans for 10-15 minutes before transferring them to a wire rack to cool completely.
Once your base cake is baked, you can move on to the exciting part of adding your desired cake decorations. Remember that the success of your cake decorations heavily relies on a well-prepared base, so take your time with this step to ensure an excellent foundation for your creative designs.
| Tools and Materials: | Description: |
|---|---|
| Piping bags | Elastic bags used for piping or decorating cakes with various fillings or frosting. |
| Nozzles | Decorative tips that attach to piping bags and create different shapes and patterns when squeezing out frosting or other mixtures. |
| Fondant | A pliable icing made from sugar, water, and corn syrup that can be rolled out and molded into various shapes for cake decoration. |
| Food Coloring | Liquid or gel-based coloring agents used to add vibrant hues to frostings, fondants, or other decorative elements. |
Types of Cake Decorations
Cake decorations can transform a plain cake into a work of art. There are various types of cake decorations that individuals can choose from, each with its own unique techniques and desired end results. Understanding the differences between these methods can help bakers determine which style will best suit their needs.
One popular type of cake decoration is buttercream piping. This technique involves using a piping bag and nozzle to create intricate designs on the surface of the cake. Buttercream piping allows for both detailed decorations like flowers and borders, as well as simple designs like shells and dots. To achieve smooth and consistent results, it is important to practice consistent pressure while piping, as well as ensuring that the buttercream is at the right consistency.
Another option for cake decoration is fondant sculpting. Fondant is a pliable icing that can be rolled out and draped over the cake to achieve a smooth finish. It can also be shaped into various figurines or objects to create customized designs. Working with fondant requires patience and precision, as it can be easily torn or cracked if not handled properly. However, with practice, bakers can achieve beautifully sculpted decorations that are both edible and visually stunning.
Gelatin flowers are another type of cake decoration that adds an elegant touch to any design. Made by pouring colored gelatin into flower-shaped molds, these delicately crafted flowers provide a three-dimensional effect on cakes. Gelatin flowers require careful preparation, as they must be refrigerated until firm before being placed on the cake. Bakers should take note of the temperature during the creation process to prevent melting or deforming.
By understanding these different types of cake decorations, bakers can unleash their creativity and choose the method that best suits their preferences and abilities. Whether it’s utilizing buttercream piping for intricacy, working with fondant for a smooth finish, or creating gelatin flowers for an exquisite touch, each technique offers its own unique possibilities for creating stunning cake decorations. With practice and experimentation, individuals can enhance their cake decorating skills and create beautiful masterpieces that are sure to impress.
Buttercream Piping Techniques
Piping buttercream decorations is a popular and versatile cake decorating technique that can add dimension, texture, and elegance to your cakes. Whether you’re a beginner or an experienced baker, mastering buttercream piping can take some practice, but the results are truly worth it. Here are some detailed instructions on how to achieve beautiful buttercream decorations for your cakes:
- Start with the right consistency: Before you begin piping, make sure your buttercream has the right consistency. It should be soft enough to pipe easily but firm enough to hold its shape. If it’s too soft, chill it in the refrigerator for a few minutes.
- Choose the right piping tip: The choice of piping tip will greatly affect the look of your buttercream decoration. Different tips create different shapes and textures. For example, a round tip can create dots or borders, while a petal tip is perfect for creating flowers like roses.
- Prepare your piping bag: Fill a piping bag fitted with your chosen tip with the prepared buttercream. Twist the top of the bag and apply gentle pressure using your dominant hand to guide the movement of the nozzle.
- Practice good control: To get smooth and consistent results, it’s important to have good control over the pressure applied to the piping bag. Squeeze firmly but steadily to maintain an even flow of buttercream.
- Piping roses: Start by holding the piping bag perpendicular to your cake surface and slightly above it. Apply pressure as you draw small circular motions in one spot, gradually building up layers until you achieve desired rose size. Release pressure and pull away swiftly to finish.
- Piping borders: Hold the piping bag at a 45-degree angle above the cake edge and apply even pressure as you move around in a continuous motion. Practice steady hand movements to maintain consistent spacing between each piped dot or shell.
- Piping shells: Hold the piping bag at a 45-degree angle and apply even pressure as you move in a wave-like motion. Start with the tip touching the cake surface, lift slightly as you pipe, and then bring it back down to finish the shell shape.
Remember, practice makes perfect when it comes to buttercream piping techniques. Don’t be discouraged if your first attempts don’t turn out exactly as planned. With time and patience, you’ll improve your skills and be able to create stunning buttercream decorations for your cakes.
Working with Fondant
Fondant is a popular cake decorating material known for its smooth and polished finish. Whether you want to cover your entire cake in fondant or create intricate decorations, working with fondant requires some specific techniques to achieve the desired result.
To start, ensure that your fondant is at room temperature before rolling it out. This will make it more pliable and easier to work with. Dust your work surface and rolling pin with a small amount of powdered sugar or cornstarch to prevent sticking. Begin rolling the fondant into a thin, even layer, rotating it frequently to maintain an even shape.
Once you have rolled out the fondant, carefully lift it using a rolling pin or your hands and gently place it on top of the cake. Smooth out any air bubbles or wrinkles by gently patting the fondant against the cake, starting from the center and moving towards the edges. If needed, use a fondant smoother tool to achieve an even and flawless finish.
When creating decorations with fondant, keep in mind that it dries out quickly when exposed to air. To prevent this, cover any leftover fondant tightly with plastic wrap or store it in an airtight container. When working with small amounts of fondant for decorations such as flowers or figurines, knead in a small amount of vegetable shortening to keep it moist and pliable.
To add texture or details to your fondant decorations, use various tools such as embossers, cutters, or molds. These tools can help create patterns like lace designs or simulate fabric textures on your cake.
Remember that practice makes perfect when working with fondant. Don’t be discouraged if your first attempts are not flawless – keep experimenting and refining your techniques until you achieve the desired results.
Edible Paint and Airbrushing
When it comes to cake decorations, adding color and unique designs can truly make a cake stand out. Edible paint and airbrushing are two techniques that can take your cake decorations to the next level. In this section, we will explore how to use edible paint and airbrushing effectively to create beautiful effects on your cakes.
Using edible paint is a great way to add intricate details or custom designs to your cake decorations. To start, you will need food-safe coloring gels or powder mixed with alcohol or clear extract to create a paint-like consistency. It is recommended to use gel colors as they have more concentrated pigments. When using edible paints, it’s essential to ensure that the paint is safe for consumption by using non-toxic ingredients.
To apply the paint, first prepare your design on a clean surface like parchment paper or directly on your cake decoration. Use a small paintbrush (preferably one specifically designated for food use) and dip it into the edible paint mixture. Gently brush the desired areas of your decoration, layering colors as needed. Allow each layer to dry before adding additional colors for better precision.
Airbrushing, on the other hand, provides a quick and efficient way of applying color gradients and creating stunning effects on cakes. To get started with airbrushing, you will need an airbrush kit that includes an air compressor, an airbrush gun, and food-safe colors specifically designed for airbrushing purposes.
Begin by mixing the desired color into the airbrush gun’s reservoir following the manufacturer’s instructions. Adjust the pressure setting on your compressor for precise control over the amount of color released from the gun. Position the cake decoration in a well-ventilated area or inside a large cardboard box to contain overspray.
Hold the airbrush gun at about a 45-degree angle from the cake decoration’s surface and gently press down on the trigger to release a fine mist of color. Start with light layers and gradually build up the desired intensity. Remember to practice control and maintain an even distance from the decoration to ensure consistent coverage.
Both edible paint and airbrushing offer endless possibilities when it comes to decorating cakes. These techniques can be used individually or combined to create stunning and unique designs. Remember to experiment, practice, and have fun while incorporating these methods into your cake decorating repertoire.
Creative Cake Toppers
Ideas for Unique and Creative Cake Toppers
When it comes to cake decorations, the possibilities are endless, especially when it comes to cake toppers. A creative and unique cake topper can take your cake to a whole new level and become the centerpiece of attention. Here are some ideas to inspire you:
DIY Wire Cake Toppers
One option for a unique cake topper is creating one yourself using wire. You can shape the wire into various figures, such as initials, hearts, or even animals. Consider incorporating different colors by wrapping colored wire around the base figure or attaching small beads or gemstones for added embellishments.
Paper Cake Toppers
Another budget-friendly and attractive option is using paper to create cake toppers. You can make intricate designs by cutting out shapes from colored cardstock or patterned paper. Paper flowers, flags with personalized messages, or even cartoon characters can be easily crafted and inserted into your cake.
Edible Decorations
For a fun twist on traditional cake decorations, consider using edible items as your cake topper. Fresh flowers are always an elegant choice; just make sure they are food-safe and haven’t been sprayed with any chemicals. Alternatively, you can use edible figurines made from fondant or gum paste that match the theme of your occasion.
Tips for Creating DIY Cake Toppers
Creating your own DIY cake toppers can be a rewarding and cost-effective way to add a personal touch to your cakes. Here are some tips for success:
- Plan Ahead: Before starting, visualize how you want your cake topper to look like and sketch out some ideas. This will help you plan the materials needed and ensure that your design fits well with the overall theme of the occasion.
- Use Sturdy Materials: Ensure that the materials you use are sturdy enough to stand or be inserted into the cake without toppling over. Consider reinforcing wire to make it more stable, choosing thicker cardstock for paper toppers, or using gum paste instead of fondant for sculpted figurines.
- Practice and Experiment: Don’t be afraid to experiment with different techniques and designs. Practice a few times before creating your final cake topper to ensure that you are comfortable with the process and achieve the desired result.
Remember, the sky’s the limit when it comes to cake decorations, so let your creativity shine through your cake toppers. Whether you choose a DIY approach or opt for store-bought options, make sure that they add that extra wow factor to your beautifully decorated cake. Happy decorating.
Troubleshooting and Common Mistakes
Identifying Common Issues
When it comes to cake decorating, even the most experienced decorators can encounter some issues along the way. It’s important to be aware of common mistakes that can occur during the process and how to troubleshoot them. One common issue is air bubbles in fondant or buttercream icing, which can create an uneven surface and ruin the overall appearance of the cake. Another issue that often arises is colors bleeding or fading when using food coloring.
Solutions and Troubleshooting Tips
To fix air bubbles in fondant or buttercream icing, one solution is to gently roll over the affected areas with a fondant smoother or icing smoother. This will help push out any trapped air bubbles and give you a smooth finish.
If your colors are bleeding or fading, make sure to use gel-based food coloring instead of liquid colorings as they have a higher pigment concentration. Additionally, be mindful of using too much moisture on your brushes when painting with edible paint as it can cause bleeding.
If you find that your buttercream decorations are not holding their shape, it may be because your icing consistency is too soft. Simply add more confectioners’ sugar to stiffen it up before piping again. For those working with fondant who experience cracking or tearing while covering a cake, kneading in small amounts of vegetable shortening can help make it more pliable.
Preventing Future Mistakes
While mistakes are inevitable from time to time, there are steps you can take to minimize them in future decorating projects. One important tip is to plan ahead and give yourself enough time for each step of the decoration process. Rushing can lead to errors and frustration.
Additionally, practicing different techniques before working on a final cake can greatly improve your skills and confidence. Consider creating small practice pieces where you can experiment with various piping designs or fondant decorations before applying them to a larger cake. This way, you can learn from any mistakes and perfect your techniques.
By being aware of common issues, having troubleshooting solutions on hand, and taking preventive measures, you’ll be better equipped to overcome challenges that arise during the cake decoration process. Remember, mistakes are simply learning opportunities and with practice, patience, and creativity, you’ll be creating stunning cake decorations in no time.
Conclusion
In conclusion, making cake decorations is not only a fun and creative activity, but it also allows you to elevate your cakes into works of art. Through this article, we have explored the necessary tools and materials needed for cake decorations, as well as the step-by-step process of preparing the base cake. We discussed various types of cake decorations, including buttercream piping, fondant sculpting, and gelatin flowers, each with their unique techniques and desired end results.
Furthermore, we delved into specific techniques such as buttercream piping and working with fondant, providing detailed instructions and useful tips to achieve professional-looking decorations. We also highlighted the use of edible paint and airbrushing to add color and unique designs to cake decorations. Additionally, we shared creative ideas for cake toppers using various materials like wire, paper, or edible decorations.
It is important to remember that during the process of making cake decorations, challenges may arise. However, we provided troubleshooting tips and solutions to help you overcome common mistakes. We encourage you to embrace creativity and experiment with your own cake decorations. Whether it’s for birthdays, weddings or any other special occasion, beautifully decorated cakes are sure to impress your friends and family.
If you are looking for further learning or inspiration in the art of cake decoration, there are many resources available such as online courses or books dedicated to this craft. Don’t hesitate to explore these options as they can provide valuable guidance and techniques from experienced decorators.
With practice and a bit of imagination, you can master the art of making stunning cake decorations that will leave everyone in awe. So go ahead and let your creativity flourish in the world of cake decorating.

Welcome to my blog about home and family. This blog is a place where I will share my thoughts, ideas, and experiences related to these important topics. I am a stay-at-home mom with two young children. I hope you enjoy reading it! and may find some helpful tips and ideas that will make your home and family life even better!


