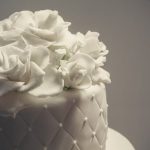
Are you looking to enhance your cake decorating skills? Learn how to use gum paste for cake decorating and take your creations to the next level. Gum paste is a versatile and pliable sugar dough that is perfect for creating intricate decorations for cakes and other baked goods. From flowers and figurines to intricate designs, gum paste allows for endless creative possibilities in cake decorating.
Gum paste is a popular choice among cake decorators because of its versatility and ability to hold its shape when molded or sculpted. In this article, we will explore the different aspects of using gum paste for cake decorating, including understanding the ingredients and tools needed, preparing and kneading the gum paste, rolling, cutting, shaping, coloring, painting techniques, adding texture and detail, as well as valuable tips and tricks for working with gum paste.
Whether you are a beginner or an experienced cake decorator, mastering the art of using gum paste can elevate your creations and bring them to life. By following our step-by-step guide and incorporating our helpful tips, you’ll be able to showcase beautiful gum paste cake decorations that will impress your friends, family, or clients. So let’s delve into the world of gum paste and discover the endless possibilities it offers for cake decorating.
Understanding the Ingredients and Tools Needed for Gum Paste
Gum paste is a popular choice for cake decorators due to its versatility and ability to create intricate and beautiful decorations. Before delving into the process of using gum paste for cake decorating, it is essential to understand the key ingredients and tools needed for working with this medium.
The primary ingredients for making gum paste include confectioner’s sugar, tylose powder (or CMC), gelatin, egg whites or meringue powder, and flavorings. These ingredients are mixed together to form a pliable dough that can be molded and shaped into various decorative elements such as flowers, figures, and other intricate designs.
Additionally, essential tools for working with gum paste include a rolling pin, cutting tools such as flower cutters or shaping tools, veining mats or molds for adding texture, and food coloring for tinting the gum paste.
When working with gum paste for cake decorating, it is crucial to have the right consistency. The gum paste should be smooth, firm but pliable, and not too sticky. This can be achieved by kneading the dough thoroughly until it reaches the desired texture. It’s important to note that overkneading can cause the gum paste to become too dry and brittle, so finding the right balance is key.
Once the necessary ingredients and tools are prepared, cake decorators can begin creating stunning decorations for their cakes. Understanding how to use gum paste for cake decorating involves mastering the techniques of rolling out the gum paste evenly, cutting out shapes with precision, and shaping the pieces into lifelike forms. With practice and patience, decorators can achieve professional-looking results that will impress any audience.
Preparing and Kneading the Gum Paste for Cake Decorating
Understanding the Texture of Gum Paste
Before you start working with gum paste for cake decorating, it’s essential to understand its unique texture. Unlike fondant, gum paste has a firmer and more elastic consistency, making it ideal for creating intricate decorations that hold their shape. The key to successfully working with gum paste is achieving the right level of pliability while also ensuring that it doesn’t dry out too quickly.
Preparing Gum Paste for Use
To prepare gum paste for cake decorating, start by kneading it on a clean work surface dusted with confectioners’ sugar or cornstarch. This helps prevent sticking and ensures that the gum paste remains smooth and workable. Use your hands to gently warm up the gum paste, then begin kneading it until it becomes soft and pliable. If the gum paste feels too stiff, you can also add a small amount of vegetable shortening to help soften it.
Tips for Kneading Gum Paste
When kneading gum paste, remember to work quickly and efficiently to prevent it from drying out. Divide the gum paste into smaller portions if you’re planning to create decorations in different colors.
Additionally, keep any unused portions of gum paste covered with plastic wrap or a damp cloth to prevent them from drying out while you work on other decorations. By mastering the art of preparing and kneading gum paste, you’ll be ready to create stunning cake decorations that will impress any crowd.
By following these steps and tips on how to use gum paste for cake decorating, you’ll be well-equipped to create beautiful and intricate designs that will elevate any cake creation.
Rolling, Cutting, and Shaping Gum Paste for Different Cake Decorations
Rolling, cutting, and shaping gum paste are essential skills for creating intricate and beautiful cake decorations. Whether you’re making flowers, figures, or other designs, understanding the techniques involved in working with gum paste is crucial for achieving professional-looking results.
Rolling Out Gum Paste
Before you can start cutting and shaping your gum paste, you need to roll it out to the right thickness. Start by dusting your work surface with a small amount of cornstarch or powdered sugar to prevent sticking. Use a rolling pin to gradually roll out the gum paste until it is about 1/8 inch thick. Be sure to lift and rotate the gum paste frequently as you roll to ensure an even thickness.
Cutting and Shaping Gum Paste
Once your gum paste is rolled out to the desired thickness, it’s time to cut and shape it into the decorations you want. For flowers, use flower-shaped cutters to create petals, then use shaping tools to give them dimension. For figurines or other shapes, use sharp knives or specialized fondant tools to carefully cut out the designs. Be sure to work quickly and efficiently, as gum paste can dry out if exposed to air for too long.
Creating 3D Effects With Gum Paste
To add dimension and depth to your gum paste decorations, consider using molds or formers designed specifically for this purpose. These tools can help you create lifelike details such as ruffles on flower petals or realistic facial features on figurines. By carefully shaping and layering the gum paste using these tools, you can achieve stunning 3D effects that will make your cake decorations truly stand out.
By mastering the art of rolling, cutting, and shaping gum paste, you’ll be able to create an endless variety of beautiful cake decorations that will impress any audience. With practice and patience, you can perfect these techniques and take your cake decorating skills to new heights. Remember that working with gum paste requires precision and attention to detail, so take your time and enjoy the creative process of bringing your cake designs to life.
Coloring and Painting Techniques With Gum Paste
Gum paste is a versatile and popular medium for cake decorating, allowing for the creation of intricate and beautiful decorations that can elevate any cake to a work of art. Understanding how to use gum paste for cake decorating involves not only knowing how to properly handle and mold it, but also how to add color and detail to bring your creations to life.
When it comes to coloring gum paste, there are a few key things to keep in mind. First, you will need to start with a white or off-white base gum paste. This will provide the perfect canvas for adding any color you desire. Gel food coloring is recommended for tinting gum paste, as it is concentrated and will not alter the consistency of the gum paste.
Once you have tinted your gum paste, there are various techniques for applying color and creating patterns or designs. From simple solid colors to intricate painted details, the possibilities are endless. One popular technique is dusting powdered food colors onto the surface of the gum paste using a soft brush, creating a subtle and natural-looking effect. Another option is using edible paint made from gel food coloring mixed with clear alcohol such as vodka or lemon extract.
In addition to adding color, painting techniques can also be used to add depth and dimension to gum paste decorations. By mixing edible dusts with clear alcohol or piping gel, you can create a palette of shades for shading and highlighting your creations. This allows for the creation of realistic floral petals, lifelike animal fur textures, and so much more – all bringing an extra level of artistry to your gum paste cake decorations.
Here’s how you can use Gum Paste:
- Start with white or off-white base gum paste
- Use gel food coloring for tinting the gum paste
- Dust powdered food colors onto the surface with a soft brush
- Create edible paint using gel food coloring mixed with clear alcohol
- Mix edible dusts with clear alcohol or piping gel for shading and highlighting
Adding Texture and Detail to Gum Paste Decorations
Once you have mastered the basics of using gum paste for cake decorating, it’s time to take your skills to the next level by adding texture and detail to your gum paste decorations. This step is crucial in creating visually appealing and realistic-looking cake decorations that will impress your friends, family, or clients.
One way to add texture to gum paste decorations is by using different tools such as veining tools, embossing mats, or textured rolling pins. These tools can create intricate patterns and designs on your gum paste, giving it a professional and polished look. You can also use edible dusts or luster dusts to add shimmer and dimension to your decorations.
In addition to adding texture, paying attention to detail is essential in achieving a stunning end result. Take your time when working on small details such as petals on flowers, scales on a fondant animal, or patterns on figurines. Using fine-tipped brushes and edible food coloring gels can help you achieve precise lines and intricate designs. With practice and patience, you’ll be able to create breathtaking gum paste decorations that will elevate your cake decorating game.
| Gum Paste Decoration Technique | Description |
|---|---|
| Using Veining Tools | Create realistic vein patterns on leaves and petals |
| Embossing Mats | Add intricate raised designs and textures to gum paste |
| Edible Dusts | Add shimmer, depth, and highlights for a more realistic finish |
Tips and Tricks for Working With Gum Paste
Working with gum paste for cake decorating may seem intimidating at first, but with the right tips and tricks, you can create stunning decorations for your cakes. One of the most important things to remember when working with gum paste is to keep it covered at all times when not in use.
This will prevent it from drying out too quickly, which can make it difficult to work with. Additionally, always make sure your hands and work surface are clean and dry before handling gum paste to avoid any unwanted marks or blemishes on your decorations.
When using gum paste for cake decorating, it’s essential to have the right tools on hand. These can include a fondant rolling pin, various shaping tools, and a foam pad for thinning out the edges of your gum paste decorations. It’s also helpful to have a small brush on hand for applying water or edible glue when attaching different pieces of gum paste together.
Another tip for working with gum paste is to start with small amounts when coloring it. This will allow you to achieve the exact shade you want without wasting too much product. Also, be patient when adding detail or texture to your gum paste decorations. Allow each layer or piece to dry completely before adding more intricate designs or details.
Overall, mastering the art of using gum paste for cake decorating takes practice and patience. With these tips in mind, you’ll be well on your way to creating beautiful and professional-looking cake decorations that will impress everyone who sees them.
| Tips and Tricks | Details |
|---|---|
| Keep gum paste covered | Prevents drying out too quickly |
| Use the right tools | Fondant rolling pin, shaping tools, foam pad |
| Start with small amounts when coloring | Achieve exact shade without wastage |
Caring for and Preserving Gum Paste Decorations
Once you have created beautiful gum paste decorations for your cake, it’s important to know how to care for and preserve them so they can be showcased on your cake in all their glory. Here are some tips on how to ensure that your gum paste decorations stay looking their best:
- Store in an airtight container: After creating your gum paste decorations, it’s important to store them in an airtight container to avoid exposure to air that can cause them to dry out and become brittle.
- Avoid direct sunlight and moisture: Keep your gum paste decorations away from direct sunlight and moisture as these elements can affect the color and texture of the decorations.
- Use silica gel packets: Placing silica gel packets inside the container with your gum paste decorations can help absorb any excess moisture and keep the decorations in pristine condition.
Properly caring for and preserving your gum paste decorations will ensure that they look just as beautiful when it’s time to showcase them on your cake. By following these simple tips, you can maintain the quality of your gum paste decorations and impress everyone with your stunning cake decorating skills.
It’s essential to handle and store gum paste decorations carefully, following these guidelines will help ensure that your hard work pays off by allowing you to proudly display your beautiful creations on top of delicious cakes.
Conclusion
In conclusion, learning how to use gum paste for cake decorating opens up a world of creative possibilities for making stunning and unique cake decorations. By understanding the ingredients and tools needed, preparing and kneading the gum paste properly, as well as mastering rolling, cutting, shaping, coloring, and adding texture and detail to your gum paste decorations, you can create show-stopping cakes that will impress any customer or guest.
Once you have learned the tips and tricks for working with gum paste, it is important to know how to care for and preserve your beautiful creations. Proper storage techniques will ensure that your decorations remain intact until they are ready to be displayed on the cake. Whether you are making simple flowers or intricate figures, showcasing your beautiful gum paste cake decorations adds a personalized touch to any special occasion.
In the end, knowing how to use gum paste for cake decorating allows you to express yourself creatively through edible art. With practice and patience, you can master this versatile decorating medium and elevate your cake designs to a professional level. So go ahead, unleash your creativity with gum paste and let your imagination run wild as you decorate cakes that will leave a lasting impression on everyone who sees them.
Frequently Asked Questions
How Do You Stick Gum Paste to a Cake?
Gum paste can be attached to a cake by using edible glue or royal icing. Before applying the gum paste, make sure the cake’s surface is clean and dry to ensure proper adhesion.
Is Gum Paste Good for Cake Decorating?
Gum paste is an excellent choice for cake decorating due to its pliability and ability to create intricate designs. It dries hard, allowing for beautifully sculpted and detailed decorations on cakes.
Will Gum Paste Melt on Buttercream?
Gum paste will not melt on buttercream as long as it is kept in a cool, dry environment. However, exposure to heat or humidity may cause the gum paste decorations to soften or lose their shape over time.

Welcome to my blog about home and family. This blog is a place where I will share my thoughts, ideas, and experiences related to these important topics. I am a stay-at-home mom with two young children. I hope you enjoy reading it! and may find some helpful tips and ideas that will make your home and family life even better!


