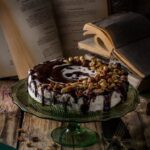
Are you looking to enhance the visual appeal of your cakes? One way to do so is by learning how to make balls for cake decorating. Whether you are a beginner or an experienced baker, adding decorative elements such as cake decorating balls can elevate the overall look of your creations.
Cake decorating plays a crucial role in making a cake not only taste delicious but also look visually stunning. It allows for creativity and personalization, turning simple desserts into works of art. Among the various decorative elements used in cake decorating, balls are a popular choice due to their versatility and ability to add depth and dimension to a cake’s design.
In this article, we will explore the different types of balls that can be used for cake decorating, the essential tools and materials needed for creating them, as well as provide a step-by-step tutorial on how to make and use these decorative elements. Additionally, we will share proven tips, creative ideas, and best practices for storing and preserving cake decorating balls.
So whether you’re looking to add simple accents or create intricate designs, mastering the skill of making cake decorating balls will open up endless possibilities for your cake creations.
Types of Balls for Cake Decorating
When it comes to cake decorating, using balls can add texture, dimension, and a touch of elegance to any design. There are various types of materials and techniques for creating cake decorating balls, each with its unique characteristics and applications.
- Fondant Balls: Fondant is a popular choice for creating cake decorating balls due to its pliable nature and ability to hold shape well. It can be easily colored using gel or powdered food coloring, making it versatile for a wide range of design options.
- Chocolate Balls: Chocolate is another fantastic material for making cake decorating balls. Whether using melted chocolate or chocolate modeling paste, it creates beautifully smooth and shiny spheres that add a delicious touch to any cake design.
- Gum Paste Balls: Gum paste is a firmer option compared to fondant, allowing for more intricate details and designs on the balls. It dries quickly and holds its shape well, making it suitable for more delicate decorations.
- Isomalt Balls: For a clear and glass-like effect, isomalt is an excellent choice for creating translucent cake decorating balls. It requires some skill to melt and mold isomalt correctly, but the results are stunning.
Each type of material offers its unique characteristics in terms of appearance, texture, and workability when creating cake decorating balls. Experimenting with different materials can lead to endless creative possibilities in cake design.
For those just starting with cake decorating, experimenting with different materials like fondant or chocolate can provide valuable hands-on experience in understanding the behavior of each material when shaping and coloring the balls. More experienced decorators may want to explore advanced techniques such as working with isomalt or gum paste to achieve specific visual effects in their designs.
Remember that practice makes perfect, so don’t be afraid to try out different materials until you find the right fit for your desired cake decorations.
Tools and Materials
When it comes to cake decorating, having the right tools and materials is essential for creating beautiful and eye-catching designs. When it comes to making cake decorating balls, there are a few key items that you will need.
Firstly, you will need a variety of fondant or gum paste in different colors, depending on the design you want to achieve. Having a good selection of colors will allow you to create visually appealing patterns and designs with your cake decorating balls.
In addition to fondant or gum paste, you will also need various sizes of round cutters to shape your cake decorating balls. These cutters will help you achieve uniform and perfectly shaped balls for your cake decorations.
Additionally, a non-stick rolling pin will be necessary for rolling out the fondant or gum paste and shaping it into balls. It’s important to have a smooth surface to work on, so a silicone mat or parchment paper can help prevent sticking and make the process more manageable.
Another essential tool for making cake decorating balls is edible food coloring. This will allow you to customize the colors of your decorations and bring your creative vision to life. Finally, having a small paintbrush on hand can be helpful for adding additional details or accents to your cake decorating balls if desired. By ensuring that you have these tools and materials on hand, you’ll be well-equipped to create stunning cake decorations that are sure to impress.
Step-by-Step Tutorial
Cake decorating balls are a versatile and essential element in creating beautiful and eye-catching cake designs. Whether you’re a professional baker or a home baker looking to elevate your cake decorating skills, mastering the art of making cake decorating balls is a valuable skill. In this comprehensive guide, we’ll walk you through the step-by-step process of creating cake decorating balls, including shaping, coloring, and finishing techniques.
Shaping the Balls
The first step in making cake decorating balls is determining the size and shape you want to achieve. You can use fondant or gum paste to create the balls, depending on your preference. To shape the balls, start by taking a small piece of fondant or gum paste and rolling it into a smooth ball between your palms. Ensure that the ball is free from cracks or creases for a polished finish.
Coloring Techniques
Once you have shaped your cake decorating balls, it’s time to add color. You can either use pre-colored fondant or gum paste or add food coloring to achieve your desired hues. For a marbled effect, try blending different colored fondant or gum paste together before shaping them into balls. If you’re going for metallic or pearlized effects, consider using luster dust or edible paints to achieve stunning finishes.
Finishing Touches
After shaping and coloring your cake decorating balls, it’s important to pay attention to the finishing touches. You can add texture by imprinting designs with silicone molds or textured rolling pins before shaping the balls. Additionally, dusting the balls with edible glitter or shimmer will give them an extra touch of elegance. Once your cake decorating balls are complete, allow them to air dry for at least 24 hours before using them to adorn your cakes.
By following these step-by-step techniques for shaping, coloring and finishing cake decorating balls, you’ll be well-equipped to enhance your cake designs with beautiful and professional-looking decorative elements.
Tips and Tricks
Choosing the Right Materials
When it comes to making cake decorating balls, the type of material you use can make a big difference in the end result. For edible cake decorating balls, fondant or gum paste are popular choices due to their pliability and ability to hold their shape. Non-edible options such as polystyrene balls are also commonly used for creating decorative elements that will not be consumed.
Coloring Techniques
One of the key aspects of achieving the perfect cake decorating balls is effectively coloring them. For fondant or gum paste balls, using gel food coloring is recommended as it provides vibrant colors without changing the texture of the material. When adding color, start with a small amount and gradually add more until you achieve the desired shade, as it is easier to darken a color than it is to lighten it.
Avoiding Common Issues
One common issue when making cake decorating balls is air bubbles forming within the material. To prevent this, knead your fondant or gum paste thoroughly before shaping into balls. If air bubbles still appear, poke them with a needle and smooth out any imperfections with your fingers. Additionally, if you find that your colored balls are sticking to your work surface, dust it lightly with cornstarch or powdered sugar to prevent sticking.
By following these tips and tricks, you can ensure that your cake decorating balls turn out perfectly every time. With a bit of practice and patience, mastering the skill of creating these decorative elements will add an extra level of flair to your cakes.
Creative Ideas
Cake decorating balls are not just for adding simple, round decorations to your cakes. There are various creative ways to use these decorative elements to enhance the overall design and make your cake truly stand out. One unique idea is to create a pattern or design using differently colored cake decorating balls.
This can be done by strategically placing the balls in a specific arrangement to form a shape, pattern, or image on the cake’s surface. For example, you can create a flower shape using colorful balls or arrange them to form an intricate geometric design.
Another creative way to use cake decorating balls is by incorporating them into 3D designs on your cakes. By carefully placing the balls in a specific layout and using different sizes and colors, you can add depth and dimension to your cake designs. For instance, you can use smaller white balls as stars in a night sky or create a textured effect by layering different-sized balls on top of each other.
In addition, consider using edible paints or food-safe markers to add details and embellishments onto the cake decorating balls themselves. This allows you to customize the appearance of the balls further and add personalized touches to your cake designs.
| Creative Idea | Description |
|---|---|
| Patterned Designs | Create shapes, patterns, or images using differently colored cake decorating balls |
| 3D Designs | Incorporate different sizes and colors of cake decorating balls for a 3D effect |
| Embellishments | Use edible paints or markers to add personalized details onto the cake decorating balls |
Storage and Preservation
When it comes to cake decorating, ensuring that your cake decorating balls remain in pristine condition for future use is essential. Proper storage and preservation techniques can make a significant difference in the quality and longevity of your decorative elements. The following are some best practices for storing and preserving cake decorating balls for future use.
First and foremost, it is crucial to store the cake decorating balls in a cool, dry place away from direct sunlight. Exposure to heat and light can cause the color of the balls to fade or change over time. Additionally, moisture can affect the texture of certain materials used in making the balls, so it’s essential to keep them dry.
One effective method for preserving cake decorating balls is to store them in an airtight container. This helps protect the decorative elements from dust, humidity, and other environmental factors that could compromise their quality. For added protection, you may also consider placing packets of food-safe desiccants inside the container to absorb any excess moisture and prevent the balls from becoming sticky or tacky.
| Best Practices | Additional Tips |
|---|---|
| Store in a cool, dry place away from sunlight. | Avoid exposure to heat and moisture. |
| Use an airtight container for storage. | Consider adding desiccants to absorb moisture. |
Conclusion
In conclusion, mastering the skill of making cake decorating balls is a valuable technique for anyone who wants to elevate their cake designs. The variety of materials and techniques available allows for endless creative possibilities, and the step-by-step tutorial provided in this article offers a comprehensive guide for beginners to get started.
By understanding the importance of cake decorating balls and practicing different shaping, coloring, and finishing techniques, decorators can enhance their cakes with beautiful and unique decorative elements.
Furthermore, it’s important to remember that experimentation is key when it comes to cake decorating. As mentioned in the creative ideas section, there are so many ways to use cake decorating balls to enhance cake designs, and decorators should feel encouraged to think outside the box and try new things. Whether it’s using different colors, sizes, or arrangements of balls on a cake, the possibilities are truly endless.
In essence, making cake decorating balls is not only a skill but also an art form that adds a special touch to any cake. As decorators continue to practice and perfect their techniques, they will find joy in creating beautiful and unique designs that make their cakes stand out. So don’t be afraid to try new things and have fun with this cake decorating technique – the results will surely be worth it.
Frequently Asked Questions
How to Make Chocolate Balls for a Cake?
You can make chocolate balls for a cake by starting with crumbled cake mixed with frosting, then rolling the mixture into small, round balls. After refrigerating them to firm up, you can dip the balls in melted chocolate and place them on a parchment-lined baking sheet to set.
The chocolate-covered balls can then be used to decorate cakes or served as bite-sized treats.
What Are the Balls Used in Cake Decorating Called?
The small balls used in cake decorating are typically called cake balls or truffles. These are made by combining crumbled cake with frosting, rolling the mixture into small spheres, and then dipping them in melted chocolate or candy coating. They can add a decorative touch to cakes and other desserts.
How Do You Make Cake Balls Smooth?
To make cake balls smooth, you can start by using a cookie scoop to portion out the mixture before rolling it into balls with your hands. Once shaped, you can chill the cake balls until firm before dipping them in melted chocolate or candy coating for a smooth finish.
It’s important to work quickly and efficiently during the dipping process in order to achieve a uniform and glossy appearance on the finished cake balls.

Welcome to my blog about home and family. This blog is a place where I will share my thoughts, ideas, and experiences related to these important topics. I am a stay-at-home mom with two young children. I hope you enjoy reading it! and may find some helpful tips and ideas that will make your home and family life even better!


